

How To Draw A Dragon Claws
Do you call back drawing a dragon is hard? Many people are initially hesitant on learning how to describe a dragon considering they retrieve information technology's not easy.
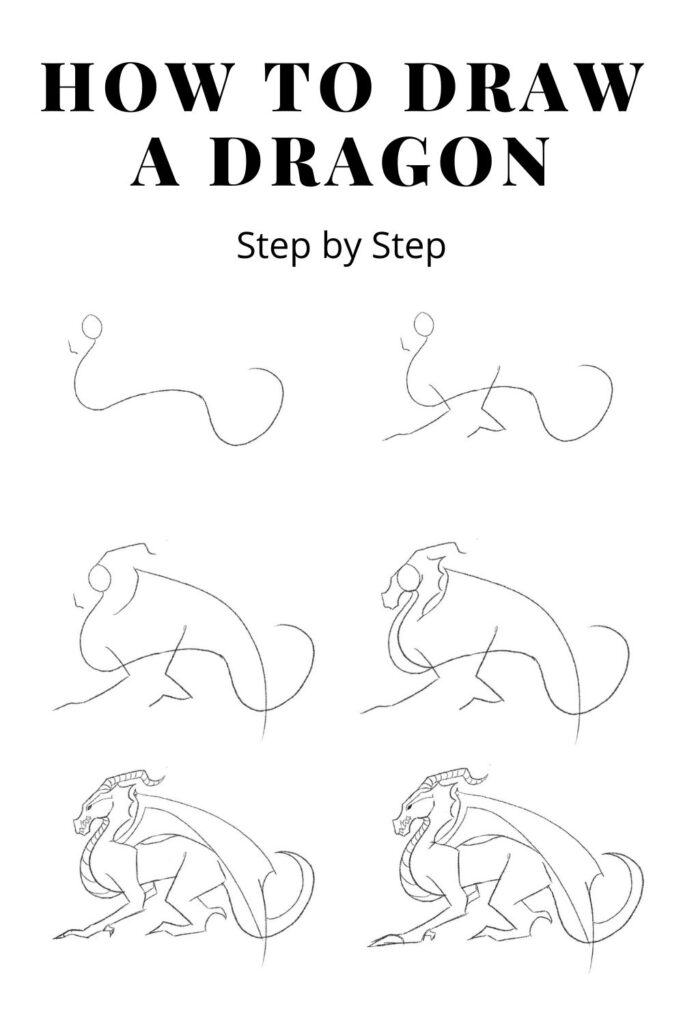
Did you know you lot can become a master at cartoon dragons in no fourth dimension by post-obit these 12 steps? These visuals will help make the process of how to describe a dragon completely unproblematic that anyone can follow.
Allow'south get started!
Accept the right drawing Tools
Before we become started, it'south important to have the right cartoon tools. Having the right tools for the cartoon will assist your drawing procedure.
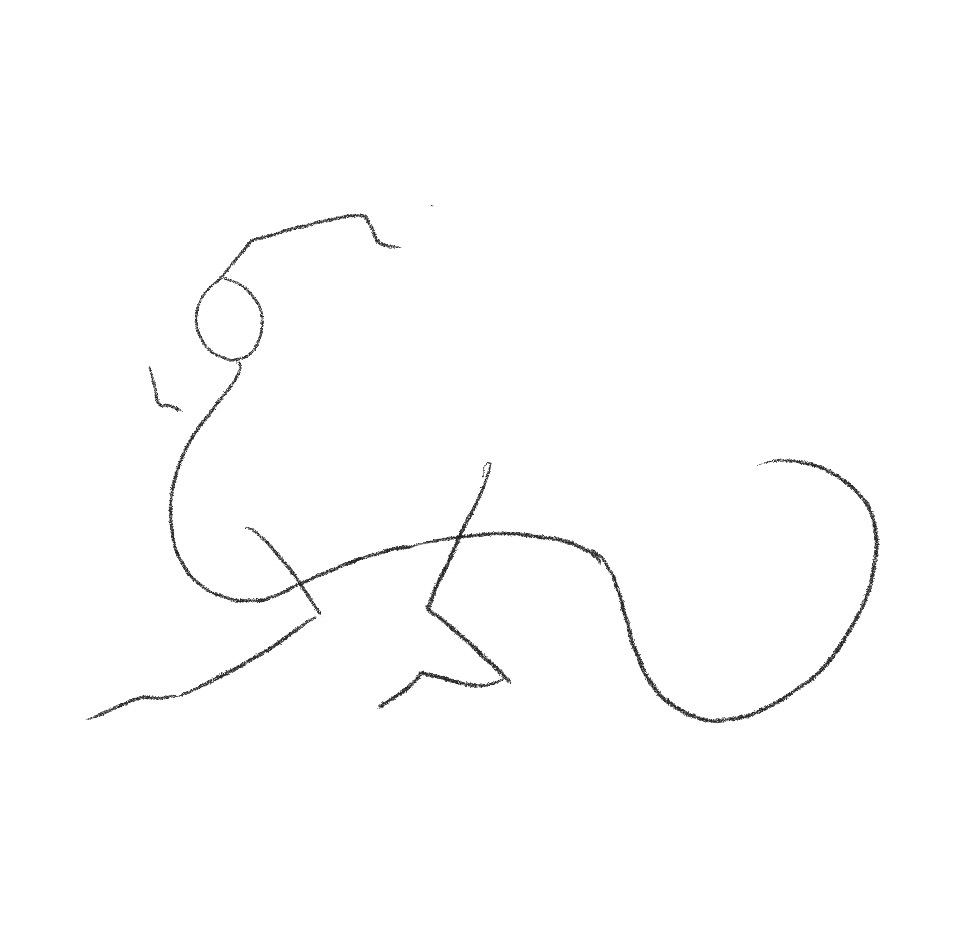
Step 1: Cartoon a dragon's head
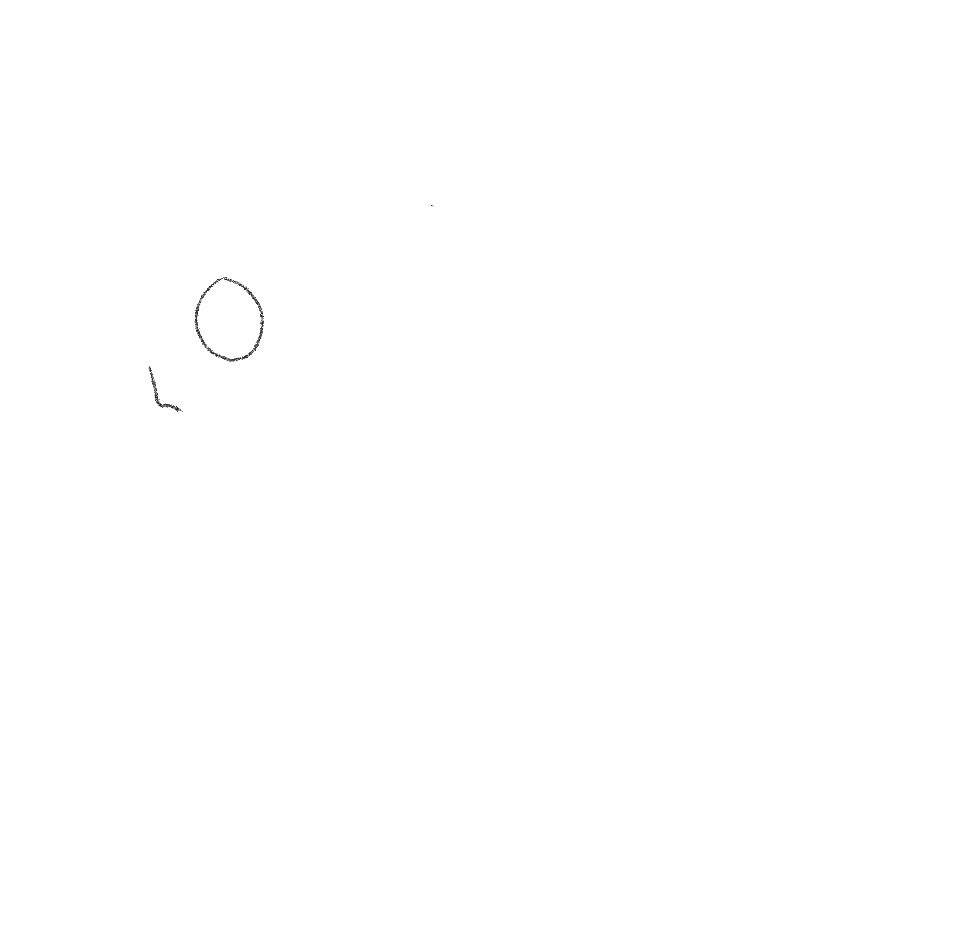
Drawing a European dragon is non as hard as it looks!
Start, y'all want to outset with the head shape.
Create a circumvolve – this volition be your head, and then to the bottom left create a carrot as this is going to guide you where to place the snout.
Stride 2: Draw line for dragon'southward body
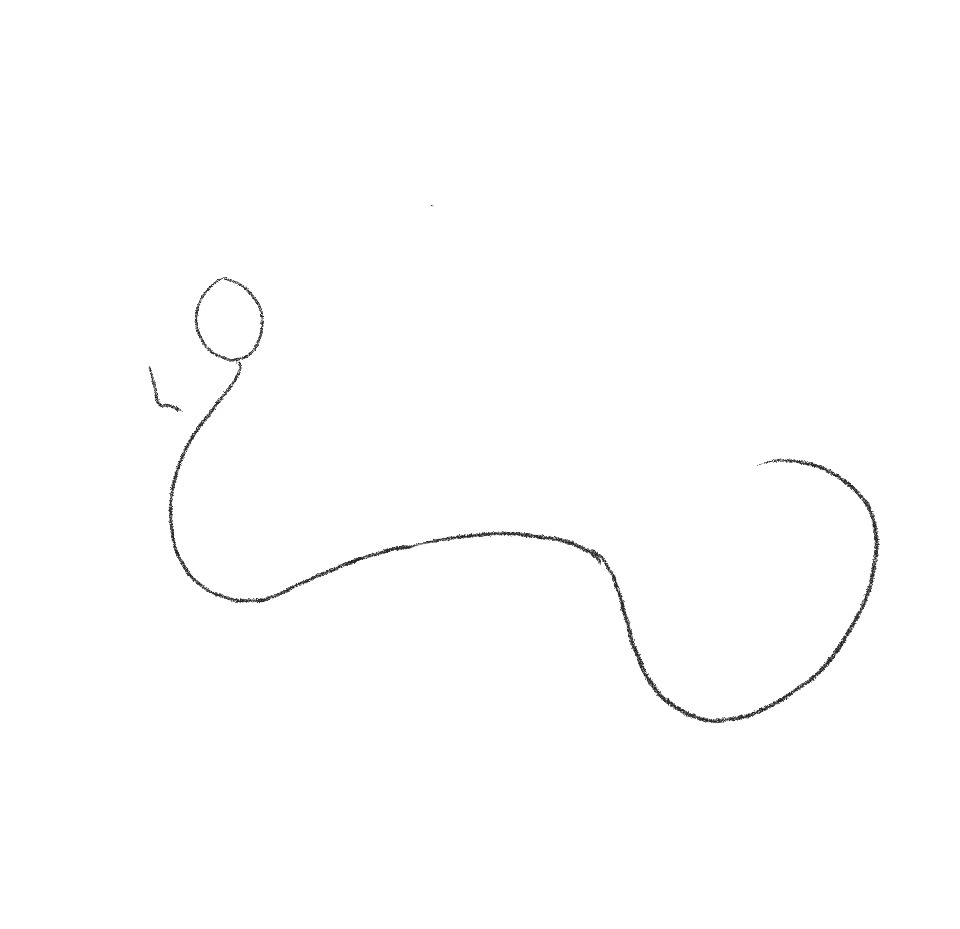
Starting from the middle-bottom of the circle we're going to describe a squiggly line in a vague shape of a "Westward".
Don't make information technology pointy like a Due west though, the edges should be round and fluid – just use the idea of a W for the general idea of where the peaks and dips should exist.
This is going to guide the body.
Step iii: Depict line for dragon's legs
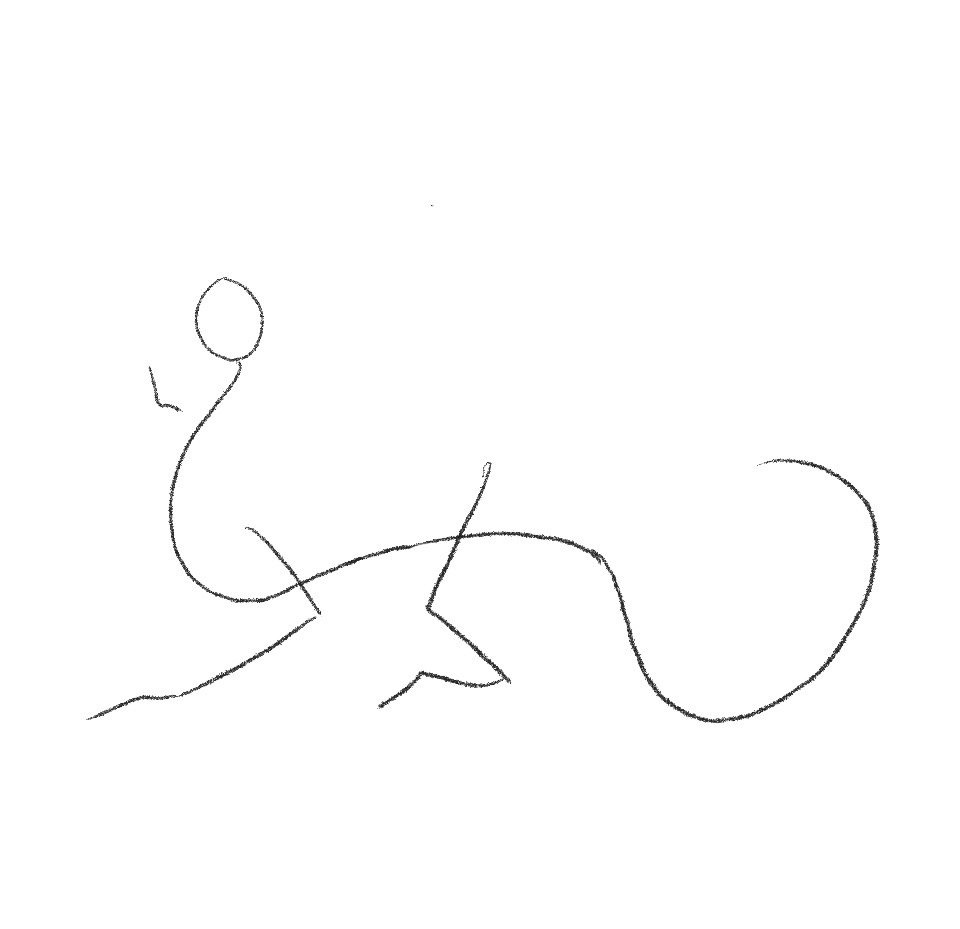
Now we're going to outline where the legs are. Here is where things become a bit tricky.
The front leg will exist shaped mostly like a > symbol with the indicate being the elbow.
And then add a fiddling line extending into the ground for the manus, brand sure information technology has a slight elevator from the end of the > to account for the wrist!
For the hind leg, we're going to create a line in the opposite shape: < with the point being the knee!
Now for the dorsum foot create a smaller line going outwards at the stopping point of your leg line so a small > tin be seen.
From there create a downward line for the hook!
Step 4: Depict dragon's horn
Now we're going to go dorsum up to the head for the horns!
At the meridian of the circumvolve create a small upwards line, then swoop that line into a downward arc and finally a little flourish dorsum towards the pinnacle.
Be sure to brand that line take some edges so it's not a smooth curling line – we want some athwart shape to the horns.
You can make these horns as big equally yous like, simply try to remember that horns have weight and the size of the caput needs to be big enough to back up them!
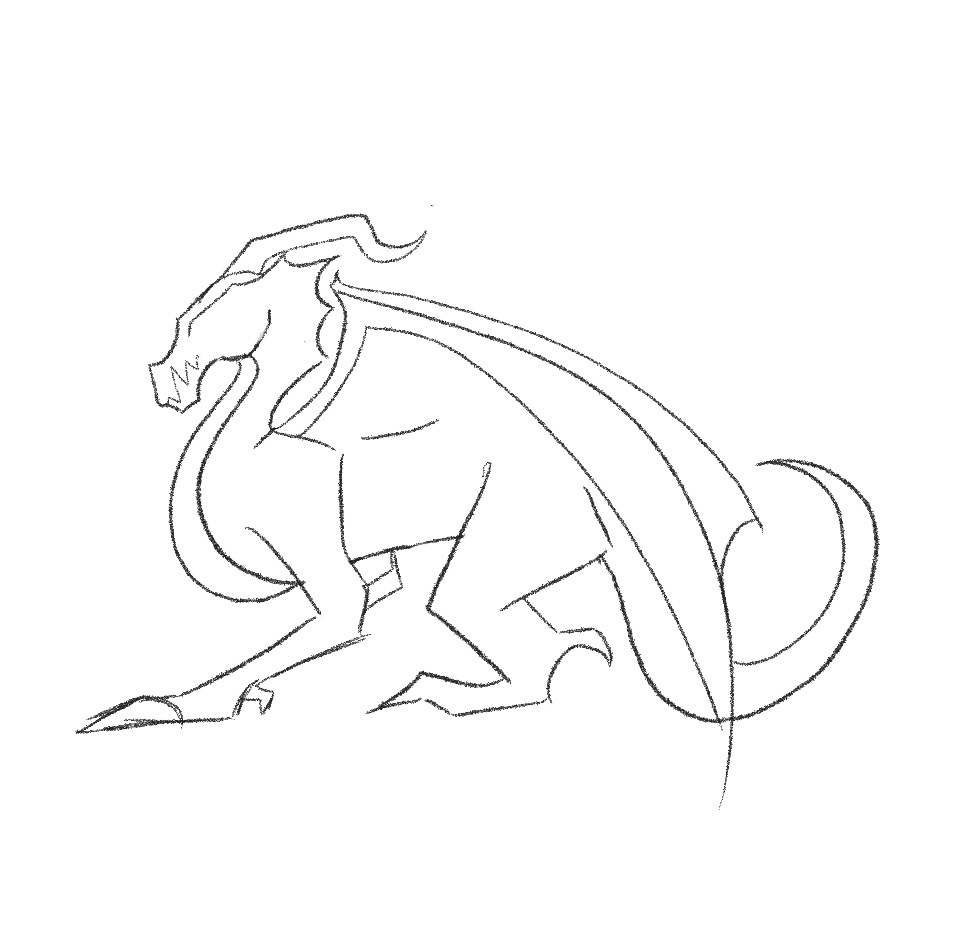
Step 5: Draw dragon'southward wings
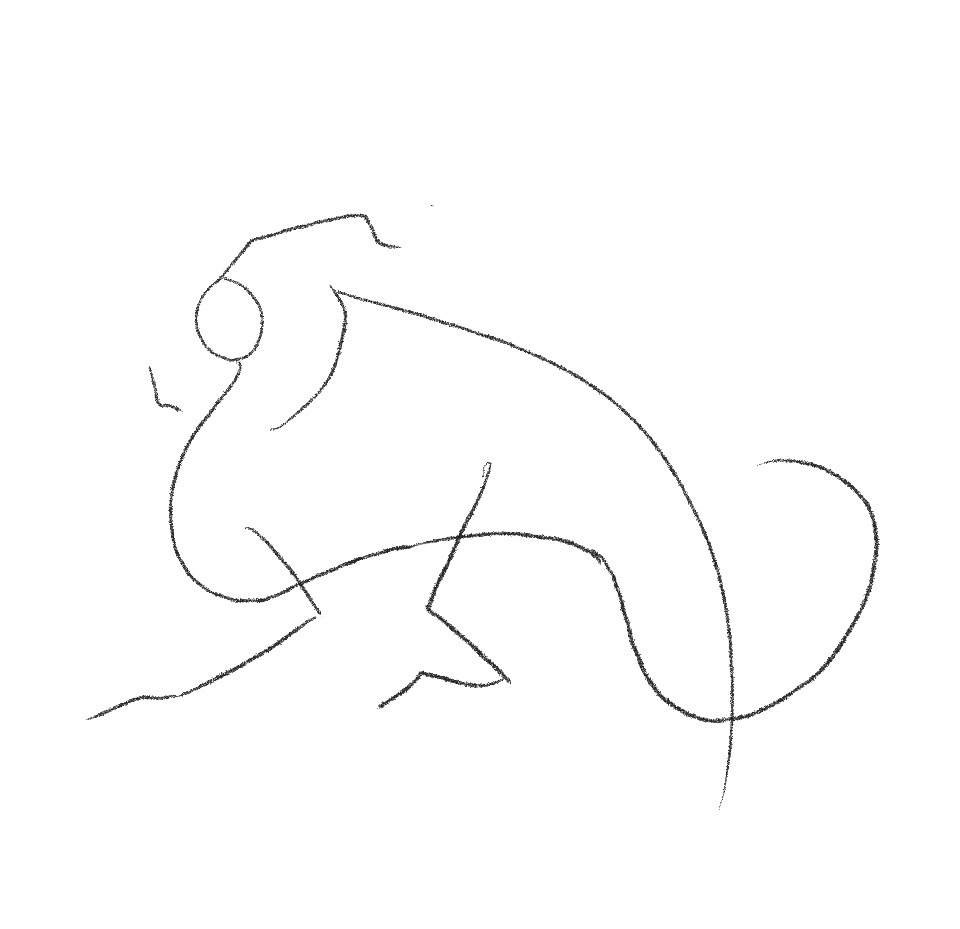
Fourth dimension for wings!
Find where yous started the front end leg line and giving enough of space between that and the start of your wing you're going to depict a line upwardly at a slight angle.
Then connect that line to a curved line going down to guide where the fly is going to fold over itself, it'southward okay if it crosses over the tail line!
Step 6: Cartoon shape of the dragon

Time to start edifice the shape of the dragon!
Once once again we're going to start at the head.
From the pinnacle of the circle continue the horn line to extend past the circle just a little flake, and then you're going to dip that line all the way to the snout where y'all'll connect it in a slight peak.
This dragon has a very athwart mode every bit you tin start to see!
From the peak, come down on an angle to create it's elevation lip.
Now, the bottom lip comes to close just below the top lip due to the way the teeth close in on each other, and then you're going to desire to come in a bit with your line before adding the squared-off chin.
This will requite yous a more than "natural" wait to the jaw. Finally, in an upward arc, you lot'll connect the jaw to the circle.
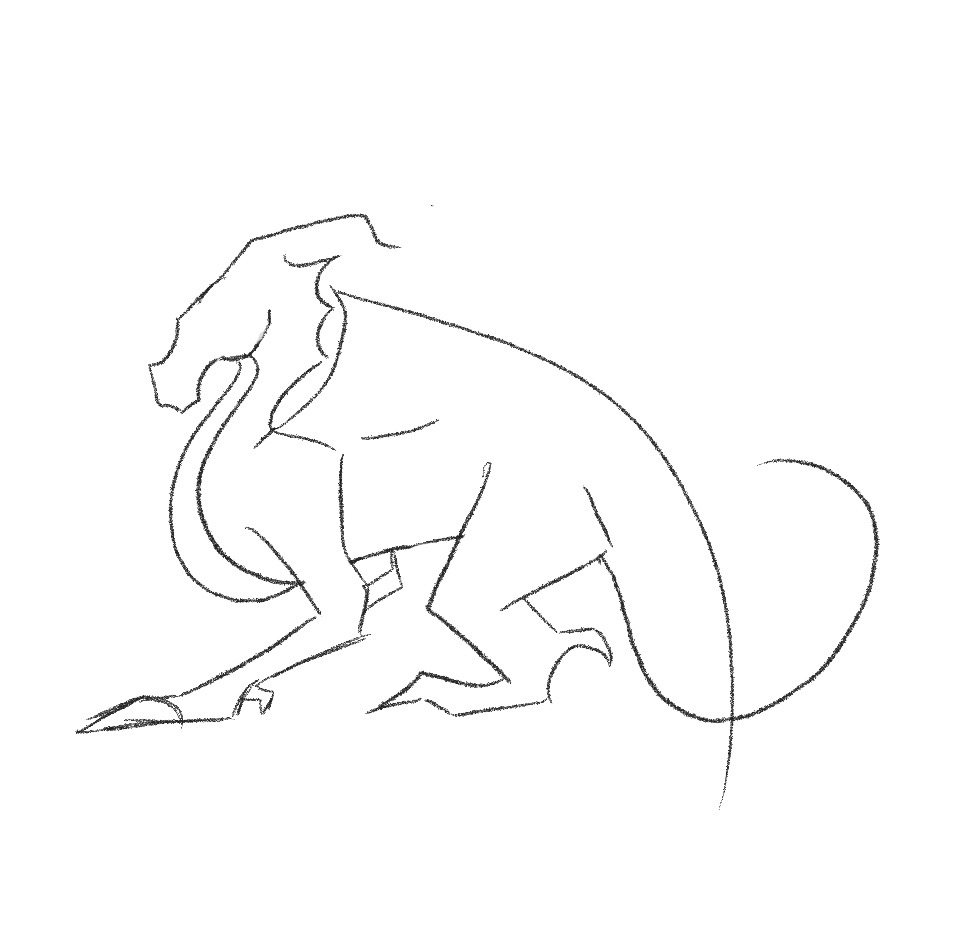
Step 7: Add together dragon's flared scales
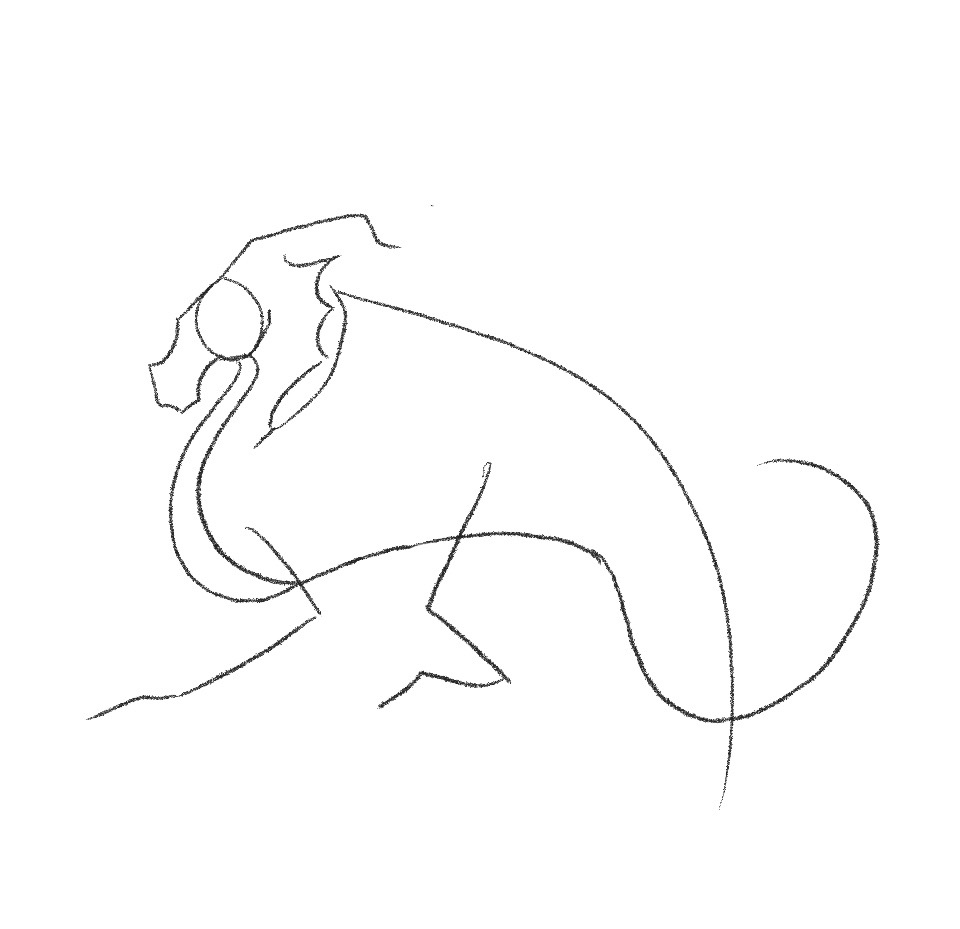
At the dorsum of the circle, nosotros're going to add flared scales!
Create a batwing-like shape with the peaks facing correct.
Then, at the circle of the head, extend a minor line upwards from the bottom of the circle to show where the jawline meets the neck.
Finally, let's beginning fleshing out the body.
Create a backward Due south shape with a 2nd line starting under the jaw of the dragon, make sure the bottom is wider than the top to continue perspective in heed.
Finally, make a little connecting line for the wing joint to help guide where the shoulder will begin.
Step 8: Draw the dragon'southward legs, shoulders, and feet
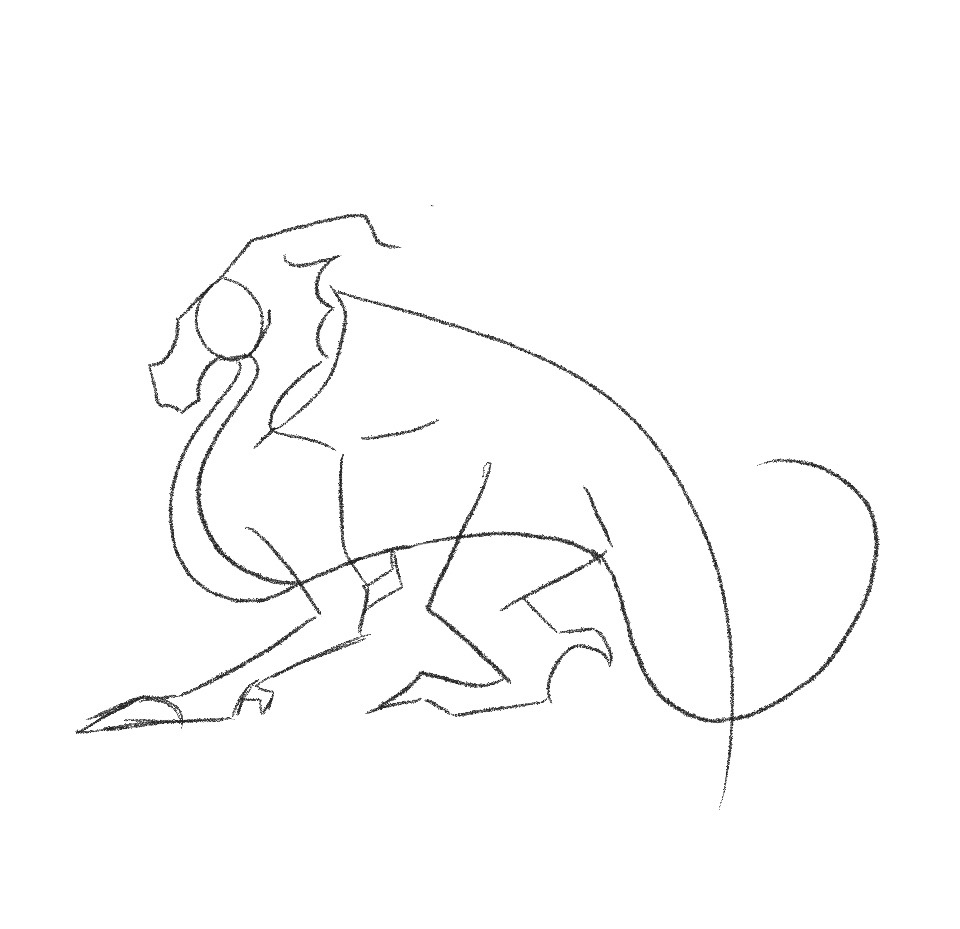
Drawing the drawing legs
Starting from the forepart leg, find the shoulder line you only made in the previous step.
Create a line going the contrary fashion, non too long but large enough to accept some musculus on this dragon, he'southward big!
So his body should reflect that.
Take into consideration how your ain arm looks, the shoulder flows into the tricep/bicep, then you take your elbow flowing into your forearm.
Information technology's the same theory hither!
Drawing the dragon shoulder
Create a squeamish large shoulder with a triangle shape going downward toward the peak of the > symbol from before steps; you're going to close the width every bit you go down.
One time you lot become to that peak come up out in a V shape to the right catastrophe with a piddling tick inwards (this is your elbow claw), then come up back into the elbow so your claw is shaped like an upsidedown L.
Now with a slight picture show back to the right (very pocket-size), we're going to bring the line in the aforementioned management every bit the guideline.
At present information technology's time for the dragon pes
For the foot, nosotros're going to start with another claw – call back of the blazon of actress claws wolves and dogs have.
Create a small hook and so from the bottom of it extend slightly downwards at present bring that line horizontally across to see where you planned out your feet!
I like to create an arc on the foot here to remind myself where the "fingers" will be later – this is optional
Time for the back leg now!
With the same theory every bit the front end leg, notice the commencement of the line you created earlier.
This time nosotros're going to create sort of a "barrel" looking muscle.
Consider information technology a 2d shoulder, just for the hind legs!
This volition be much wider and larger than the front legs as the dragon carries its heart of balance in the back.
Create a triangle with the signal facing towards the tail a adept distance from the offset of the guideline, we want a beefy leg hither.
The ending of that triangle line should exist a piddling flake away from the betoken from the < line we made earlier.
This is the knee! Now match the direction of the line going towards the right, merely don't go too far!
We need to create a heel claw!
For this one, you'll want the underside of the claw to be an arc going downward into the foot.
Now finish off your foot with a few lines matching the guideline from before.
Step 9: Erase overlapping lines
This one is an easy one: Erase overlapping lines!
Erase the circle from the caput and the lines that cut through the legs from the body.
Nosotros don't demand those anymore
Step 10: Add together more details
Okay at present let'due south get a bit more details.
Close off the tail line with a matching line to a higher place information technology going from a wider width to a point with a smaller width.
From the acme flare on the head (the largest ane) we're going to extend that line for the eyebrow ridge, exist sure to give this some angular shaping – it should not be a directly line.
Even so, at the head, allow's move on to teeth.
Where the top lip meets the lesser lip create some varying sized triangles up and downwards going inward towards the dorsum of the head just not also far!
A few will do it. Now close off the horn with a wider base and slimmer indicate.
WINGS! This is the catchy part equally information technology involves a chip of perspective.
From the connection to the shoulder, create a second line matching the direction underneath it.
Follow the direction of the curved line getting wider at the base of operations.
Now add another, smaller and shorter, curved line on the other side of this closed arc calculation a little moving picture at the point where they run across for the wing joint!
Step 11: Drawing details of dragon's confront
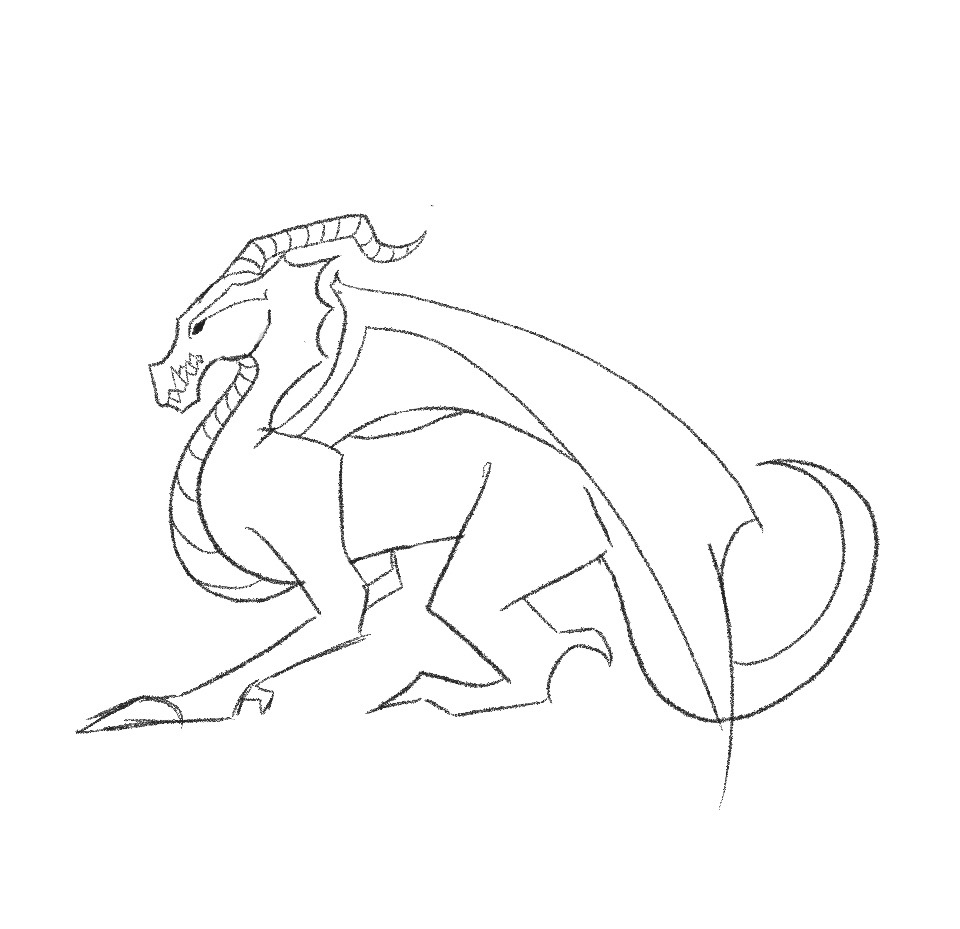
Almost at that place! Add the underside of the eyebrow ridge, getting wider as you lot go towards the back of the head.
Don't connect it to the head flares!
Under that divers ridge create an almond shape and fill it in – that'due south your eye!
Close off the teeth past connecting the open points on the triangles.
Add some ridgelines to the horns and that little backward "S" shape on the chest (make sure the lines go bigger as yous go towards the legs)
Finally, close that space on the back of the dragon with an upwards arc to grade the inner fly and erase the line that cuts through the dorsum of the fly starting at the wing joint!
Pace 12: Refining the dragon's anxiety
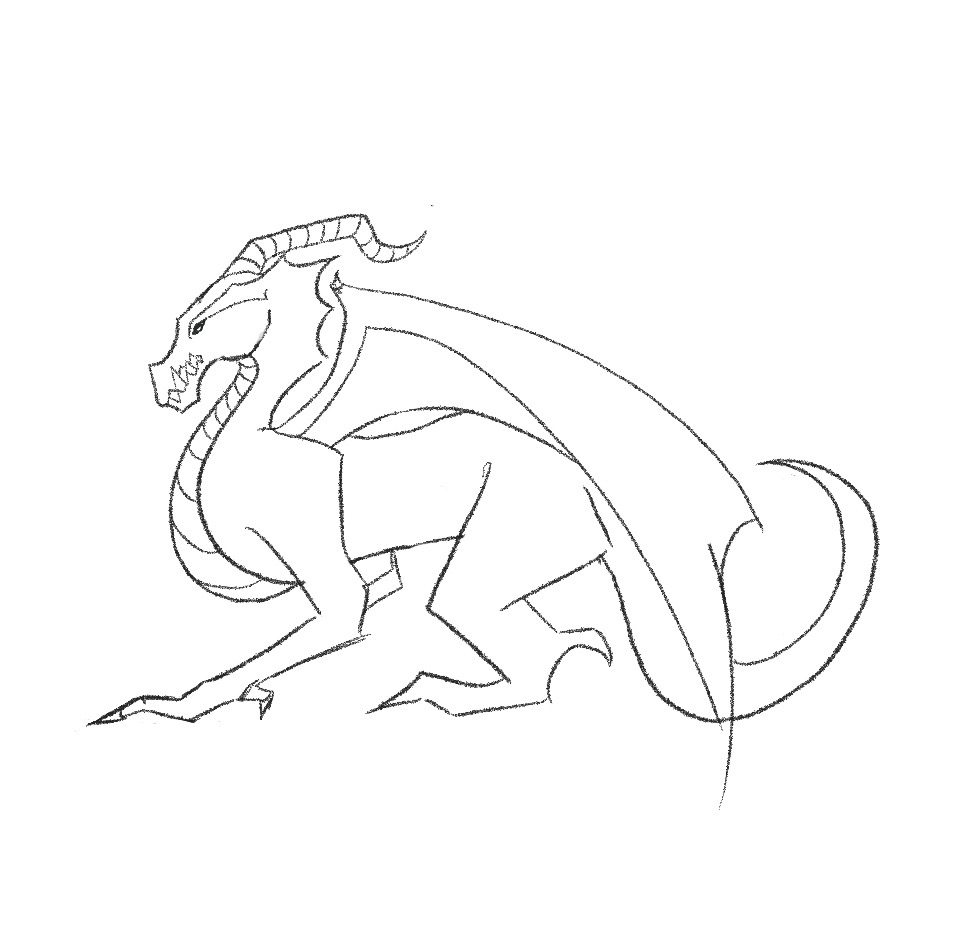
Refine your feet!
Using the guideline placed earlier, shape those claws in whatever way you see fit – the beautiful affair virtually dragons is that no two are the aforementioned and you tin can essentially shape them all the same you want so long as y'all keep in mind anatomy, weight, and full general function!
At that place you go! Your very own dragon!
I'd like to thank Carolyn for sharing her process.
Be sure to check out her social @ClazDesign if you enjoyed her illustrations.
She too has some amazing prints and illustrations available in her shop.
Other Step past Pace Drawing Topics to Assistance You
- How to Draw a Rose (vii Piece of cake Steps)
- How to Draw Dogs – Easy Stride past Step Tutorial for Cute Dogs
- How to Depict Realistic Copse Like a Pro
Agile Time 20 minutes
Total Time 20 minutes
Difficulty Easy
Estimated Cost $0
Materials
- Pencil
- Paper
- Or tablet and stylus
Tools
- Pencil
- Paper
- Or tablet and stylus
Instructions
- Step 1: Drawing a dragon'south caput. Cartoon a European dragon is not equally hard as it looks! First, you desire to outset with the head shape. Create a circle - this volition be your head, and then to the bottom left create a carrot equally this is going to guide y'all where to place the snout.
- Step 2: Draw line for dragon's torso. Starting from the center-bottom of the circle we're going to describe a squiggly line in a vague shape of a "W". Don't make it pointy similar a West though, the edges should be round and fluid - just utilise the idea of a W for the general idea of where the peaks and dips should be. This is going to guide the body.
- Step 3: Draw line for dragon's legs
Now nosotros're going to outline where the legs are. Here is where things get a bit tricky. The front leg volition exist shaped by and large like a > symbol with the bespeak being the elbow. And then add a petty line extending into the basis for the paw, brand sure information technology has a slight lift from the end of the > to business relationship for the wrist! For the hind leg, nosotros're going to create a line in the opposite shape: can be seen. From there create a downwards line for the hook!
- Step 4: Describe dragon'southward horn
Now we're going to go back up to the head for the horns! At the pinnacle of the circle create a pocket-sized upwards line, then swoop that line into a downward arc and finally a little flourish back towards the top. Be sure to brand that line take some edges so it's non a smooth curling line - we want some angular shape to the horns. Y'all tin make these horns as large as you like, simply try to remember that horns have weight and the size of the head needs to exist large enough to support them!
- Stride 5: Depict dragon's wings
Fourth dimension for wings! Detect where you started the front leg line and giving plenty of space between that and the kickoff of your wing y'all're going to draw a line upwards at a slight angle. Then connect that line to a curved line going down to guide where the wing is going to fold over itself, information technology's okay if it crosses over the tail line!
- Step 6: Cartoon shape of the dragon
Fourth dimension to start building the shape of the dragon! Again we're going to start at the head. From the top of the circle continue the horn line to extend past the circle just a little bit, and then you lot're going to dip that line all the manner to the snout where yous'll connect it in a slight peak. This dragon has a very athwart style as you can start to see! From the peak, come down on an angle to create its top lip. Now, the bottom lip comes to close only below the height lip due to the way the teeth close in on each other, then you're going to want to come in a bit with your line before adding the squared-off chin. This will give yous a more than "natural" wait to the jaw. Finally, in an upward arc, you lot'll connect the jaw to the circumvolve.
- Step seven: Add dragon'due south flared scales
At the dorsum of the circle, we're going to add flared scales! Create a batwing-like shape with the peaks facing correct. Then, at the circle of the head, extend a small line upwardly from the lesser of the circle to evidence where the jawline meets the neck. Finally, let's showtime fleshing out the body. Create a backward Due south shape with a 2nd line starting under the jaw of the dragon, brand sure the lesser is wider than the meridian to keep perspective in heed. Finally, make a niggling connecting line for the wing joint to help guide where the shoulder will brainstorm.
- Pace 8: Describe the dragon'southward legs, shoulders, and feet
Drawing the dragon legs. Starting from the front leg, discover the shoulder line you just fabricated in the previous step. Create a line going the contrary mode, not too long just large enough to have some musculus on this dragon, he'southward large! so his trunk should reflect that. Take into consideration how your own arm looks, the shoulder flows into the tricep/bicep, then you have your elbow flowing into your forearm. It's the same theory hither!Drawing the dragon shoulder. Create a squeamish big shoulder with a triangle shape going downwards toward the peak of the > symbol from earlier steps; you're going to close the width as y'all go downwardly. Once you get to that acme come out in a V shape to the right ending with a little tick in (this is your elbow hook), then come up back into the elbow and then your claw is shaped like an upsidedown L. Now with a slight movie back to the correct (very small), nosotros're going to bring the line in the aforementioned management as the guideline.
Now it'due south time for the dragon human foot. For the pes, we're going to start with some other claw - call back of the type of extra claws wolves and dogs have. Create a small claw then from the bottom of information technology extend slightly downwards now bring that line horizontally across to meet where you planned out your feet! I like to create an arc on the pes here to remind myself where the "fingers" volition exist later - this is optional
Fourth dimension for the back leg now!. With the same theory as the front leg, find the outset of the line you created earlier. This time we're going to create sort of a "butt" looking muscle. Consider it a 2d shoulder, but for the hind legs! This will be much wider and larger than the front legs equally the dragon carries its middle of balance in the back. Create a triangle with the point facing towards the tail a good distance from the beginning of the guideline, we want a beefy leg here.
The ending of that triangle line should exist a picayune chip away from the signal from the
- Step ix: Erase overlapping lines
This one is an easy one: Erase overlapping lines! Erase the circle from the head and the lines that cut through the legs from the body. We don't need those anymore
- Step x: Add more detailsOkay now let'southward get a scrap more than details. Shut off the tail line with a matching line above it going from a wider width to a indicate with a smaller width. From the top flare on the head (the largest 1) we're going to extend that line for the countenance ridge, be certain to give this some angular shaping - it should not exist a straight line.
Nevertheless, at the head, allow'due south move on to teeth. Where the summit lip meets the bottom lip create some varying sized triangles upwards and down going inwards towards the back of the head simply non too far! A few volition practice it. Now shut off the horn with a wider base and slimmer point.
WINGS! This is the tricky role every bit it involves a fleck of perspective. From the connection to the shoulder, create a 2nd line matching the management underneath information technology. Follow the direction of the curved line getting wider at the base. Now add together another, smaller and shorter, curved line on the other side of this closed arc adding a lilliputian flick at the point where they run into for the wing joint!
- Footstep 11: Drawing details of dragon's face
Almost in that location! Add the underside of the eyebrow ridge, getting wider as you go towards the dorsum of the head. Don't connect it to the head flares! Under that divers ridge create an almond shape and fill up it in - that's your middle!
Close off the teeth past connecting the open points on the triangles.
Add some ridgelines to the horns and that little backward "Southward" shape on the chest (make sure the lines get bigger as you go towards the legs)Finally, close that infinite on the dorsum of the dragon with an upwardly arc to grade the inner wing and erase the line that cuts through the back of the wing starting at the wing joint!
- Step 12: Refining the dragon's feet
Refine your feet! Using the guideline placed earlier, shape those claws in any way you see fit - the cute thing about dragons is that no two are the aforementioned and you lot can essentially shape them withal you desire so long as y'all go on in mind beefcake, weight, and general function!There you get! Your very own dragon!

Source: https://jaejohns.com/how-to-draw-a-dragon/
Posted by: oconnellfrawing1956.blogspot.com
0 Response to "How To Draw A Dragon Claws"
Post a Comment